Part of any great help system is a Table of Contents (TOC) to help the user navigate through the topics. In this exercise we are going to use the project that we created from the last lesson, but add some navigability to the Reverb output by adding levels to our output. Let's begin!
Open up the WEP project that you previously created by using the Windows Explorer when you go to File -> Open, or by using the Recent Projects panel in the Start Page
Click on the first FM file again, right click and then click Display Preview
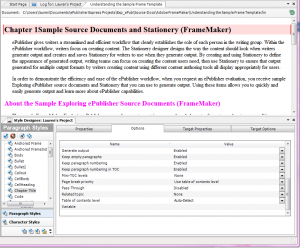
Click on the very first heading in the preview window and then the Style Designer will appear in the bottom as shown:

You will see that the level is automatically set to Auto-TOC but for the purposes of this demonstration we are setting the Table of Contents level to 1.5. Notice again that when we change something in the Options pane, that this also makes the paragraph style bold to indicate that a change has been made.
Repeat the steps to give Heading 1 a level of 2 and Heading 2 a level of 3
Save the project and click the generate all 3 gears located on the toolbar
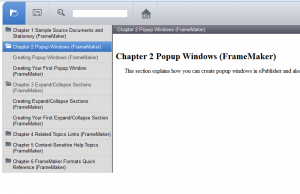
Now your output should look something like this:

It looks good except that because this is a web output we don't really need to have the chapter numbering. Never fear, ePublisher has a way to fix that as well.
Going back to the Options panel for each of the Paragraph Styles in the Style Designer locate the Keep paragraph numbering and the Keep paragraph numbering in TOC dropdowns
We are going to set both of those to Disabled and we are going to repeat this for all 3 paragraph styles we modified
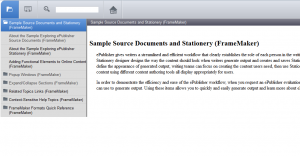
Save and generate and now the output should look like this:

As you work more with your documents, you will need to do the Display preview less as you will already know what you have set in the documents, and then you can construct your Designer projects and then base the stationery on that. Following lessons will include different aspects of generating online help that will be useful for you in getting all that you can out of ePublisher. Feel free to make suggestions via the comments on anything as a new user that would be helpful to learn, and I will take them into consideration in creating the next tutorial. Please note that advanced customization topics such as XSL or Javascript will be best handled through the Study Hall sessions. We also have introductory topics with our Show Me sessions.